
comment
As you may know, we provide a complete extension to WebSharper for ExtJS. It allows you to easily create full-fledged user interfaces with features one would expect from a desktop application.
The folks at Sencha have also developed a wonderful tool to design ExtJS interfaces called ExtJS Architect. It's a visual designer that allows you to very intuitively create a complete UI from the ground up and still provides access to every one of the numerous options and parameters ExtJS offers. And, as it turns out, it is very easy to use an interface created in Architect from a WebSharper application. Here is how.
A simple ExtJS Architect interface
Creating an interface
For this example, we will create the most basic UI possible in Architect. My goal is not to explain how to use Architect — it's not difficult anyways ;) — but simply to have a UI to integrate to WebSharper.
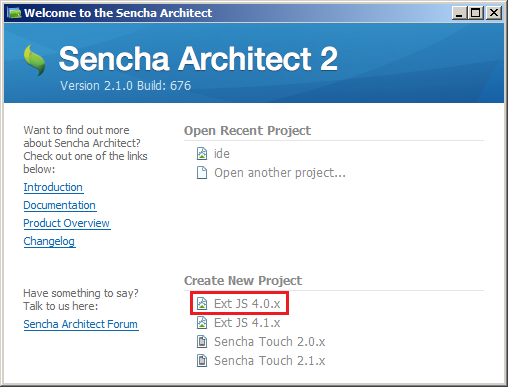
In the welcome screen, select "Ext JS 4.0.x". This is the version that is currently bound in the WebSharper extension. An extension for 4.1.x will be available as soon as possible, but until then, 4.0 it is.
You are now on the main screen of Architect. From the left menu, select "Containers", then drag-and-drop "Viewport" into the central area. The viewport is the full-page container into which the application components will be inserted.
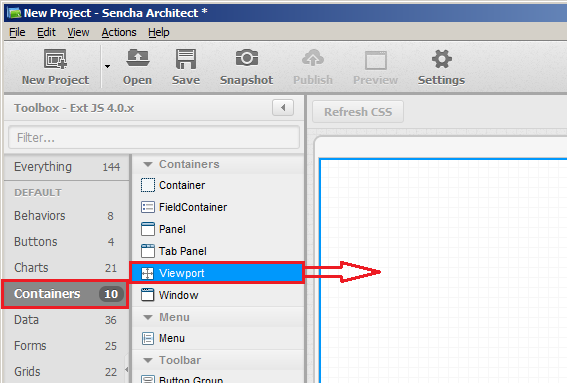
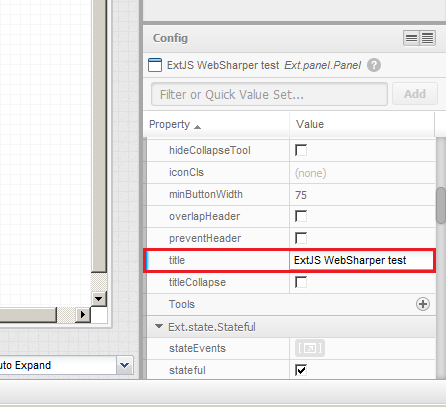
Now, drag a Panel into the viewport you just created. This will create a container with a title bar. You can customize the title, and any other attributes, in the "Config" area (bottom-right).
You can now click the "Save" button and choose a location to save your project. With this, we have everything we need to learn how to use this UI we just created from WebSharper. You can beef it up a bit if you want, nothing is more satisfying than seeing a complete application appear on the first try ;)
Integrating with WebSharper
The integration can be done in a few simple steps.
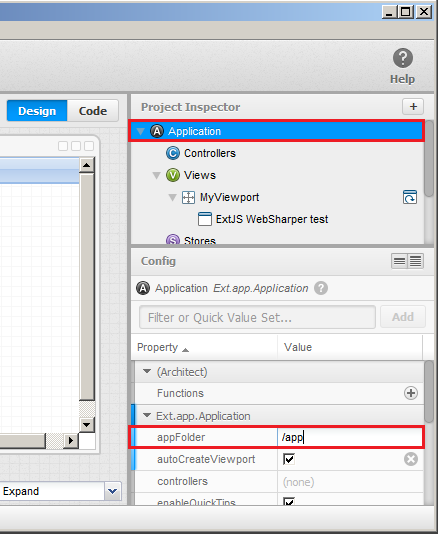
In the Project Inspector (top-right tree view), select the root node ("Application"). Then in the Config area, change the appFolder to "/app". Using an absolute path will avoid any problem when your application is served from a URL with subpaths, which will probably happen if you use Sitelets.
In the "Settings" dialog of Architect (gear icon), go to the "Project" tab and set the "Publish path" to the Web project of your WebSharper application, which will generally be
SolutionPath/ProjectName/Web.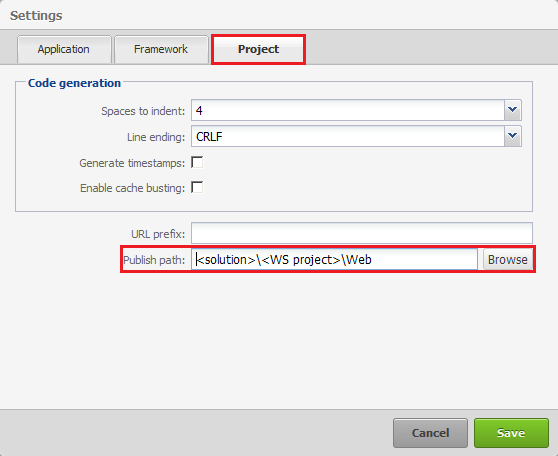
Now, your WebSharper project. In the HTML of your application, which will be Web/Main.html if you use the Sitelets project template, insert the following line:
1
<script type="text/javascript" src="/app.js" />
You want to put it after the WebSharper script manager, ie. the
<meta data-replace="scripts">tag. This way, WebSharper will have loaded ExtJS before trying to load the UI.Don't forget to add a reference to IntelliFactory.WebSharper.ExtJS.dll in your F# project. Now, the way dependencies work in WebSharper, ExtJS JavaScript and CSS tags are only added by the script manager if a class from ExtJS is used in code directly called from a
Web.Control. However, here we are going to make ExtJS call directly a F# function when it has finished loading the UI. So we will need to add the following control somewhere on our page:1 2 3 4 5 6 7 8 9 10 11 12
module Client =
    open IntelliFactory.WebSharper.Html
    open IntelliFactory.WebSharper.ExtJS

    [<Sealed>]
    type Control() =
        inherit Web.Control()

        [<JavaScript>]
        override this.Body =
            Ext.OnReady ignore // use ExtJS in order to trigger the dependency
            Div [] :> _
- And finally, every time you modify your UI in Architect, click the "Publish" button, and voilà! Your application is up-to-date. No need to recompile your WebSharper application, since you only modified static JavaScript files.
Interacting with the UI from F#
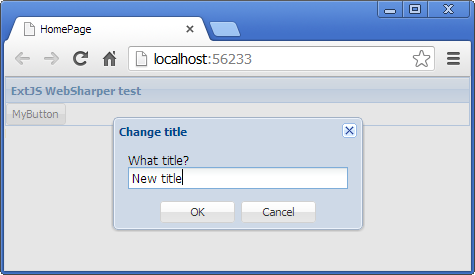
All right, you have a nice and shiny user interface. But it doesn't do anything useful yet; it's time to fix this. We will now add code which, whenever the user clicks a button, displays an input dialog and then replaces the title of the panel with what the user has input.
First, let's add a button to our UI. Simply drag a Buttons > Button into the panel, customize the "text" config if you want to, save and publish.
As previously mentioned, we will make ExtJS call a F# function once the UI has been loaded. To do so, in the Application's config panel, click the + button on the "launch" line, then the arrow button that appeared. Then insert the following code into the editor:
1
Website.Client.Init(Ext.ComponentQuery.query("viewport")[0]);
Website.Client.Init is the F# function we are going to write; adjust the namespaces according to your application. And once again, don't forget to Publish.
Now, let's write this control function. Here is the code:
1
2
3
4
5
6
7
8
9
10
    [<JavaScript>]
    let Init (viewport : Ext.container.Viewport) =
        let button = viewport.Query("button").[0] :?> Ext.button.Button
        let panel = viewport.Query("panel").[0] :?> Ext.panel.Panel
        button.On("click", fun () ->
            Ext.Msg.Prompt("Change title", "What title?", fun (btnId, answer) ->
                if btnId = "ok" then
                    panel.SetTitle answer
            )
        )
viewport.Query retrieves an array of elements that match the given query. Since we have only one panel and one button, we can simply query by type; if you need to retrieve a specific element, you can give it an "id" config in Architect and use viewport.Query("#the_id"). The rest of the code is pretty self-explanatory: we attach a handler on the "click" event of the button, which opens a prompt window asking for a title.
 See all tags